} -->

Sunday, November 30, 2014

The Beginning of Woodworking

Awhile ago I was surfing the internet on tools for woodworking and anything related to wood working and I came across a YouTube video of a man named Matthias Wandel. I must have watched over 20 videos of this guy and his creation. While I was exploring his website I came across a very informative post about where to begin as a woodworker/diy hobbyist.

I am actually using this approach with a few exceptions. He states not to buy until you are at the point of needing it. I bought my miter saw right from the beginning and a brad nail gun to make things easier. Below are my reasons why.

The first exception is buying a Miter saw in the beginning. I have gotten a lot of use with my Miter saw. He explains why he doesn't like it but I have found a great deal of use with it.

The second would be a Nail gun or Brad gun. I just bought one because whenever I had to nail something with a small nail I would have to pre-drill the hole and then hammer each nail. I wanted something quicker and easier so I purchased a Bostitch 18 ga 5/8" - 2 1/8" brad nail gun . I have yet to use it but I know it will make my life a lot easier in the shop plus I got it for almost half the price thanks to my wife.

Here is his link to his web page and from there you can navigate to his various websites.

Matthias Wandel

Here is what he has to say about the beginning of woodworking.

A question I get asked from time to time is how to get into woodworking, what tools I would recommend, and where to start.
I can't really make good recommendations as to what specific brands of tools are better than others. Most of my tools were opportunistic purchases, with relatively little regard to specific brands. More often than not, it's price and a quick inspection to gauge the solidity of the tool that are the determining factors. My tools are usually not among the best that can be had, but good enough.

Where to start?


But where to start with woodworking? What machines do you need? My suggestion is that you should start by doing some woodworking, and only after that start buying big equipment.
I don't mean that entirely literally. But I think it's best if you buy just a few tools and start using those. As you get more comfortable with what you have, it becomes easier to understand what tools you should get next. It also reduces the risk of buying a workshop full of tools only to find out that you aren't really into woodworking.
Start by getting a few hand tools - a hammer, screwdrivers, nails, a few chisels, a hack saw, a try square, some sort of work table, and some clamps.
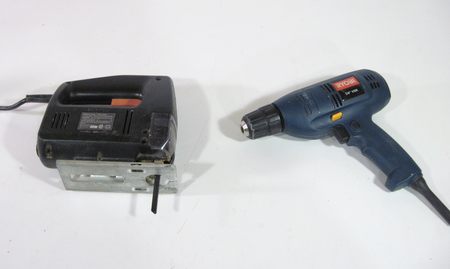
The Beginning of WoodworkingYour first power tools should probably be a drill and a jigsaw. Those are tools that come in handy here and there, even if you are not into woodworking. You won't be able to make any fine furniture with them, but it's enough to bang together a few projects for the basement or outside.
There are different grades of tools available at different prices. Salesmen will probably tell you to get good quality tools that last a lifetime. But the price difference between a cheap tool and a good quality tool can easily be a factor of four. My advice is to get cheap tools first and use them until they break. Once they break, it's time to consider getting something better. But unless you are a professional who uses the tools every day, even a cheap tool is likely to last a long time.
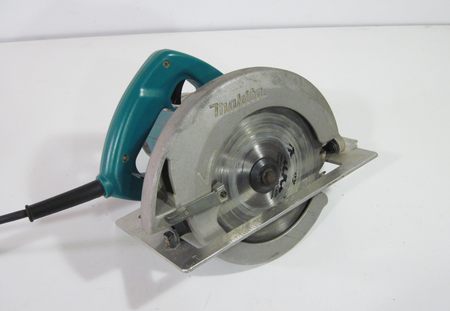
The Beginning of WoodworkingA good tool to get next is some sort of circular saw. A circular saw cuts a lot faster than a jigsaw, and it's easier to make a straighter cleaner cut with it. It's also a very useful tool for cutting up big sheets of plywood, even if you already have a table saw. At this point, you have enough tools for some simple projects such as this table or some storage shelving
You should consider getting a hand plane or two at this point, and maybe a workbench with a vise on it. It may be a good challenge to build a workbench while you are at it.
You may also want to invest in a doweling jig, or a pocket hole jig (although I'm personally not very fond of pocket holes joinery because it's not very strong) 

With just the tools mentioned above, you can already tackle some basic projects.


Getting into stationary machines
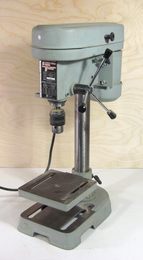
The Beginning of WoodworkingThe Beginning of WoodworkingYou can get a lot of hand-held power tools, but after getting the assortment mentioned above, it's probably time to start looking at getting some stationary tools.
The most useful stationary tools are a drill press and a table saw. For the longest time, I only had a cheap old contractor saw, and only a very small drill press, but I made do with those. The difference between a good drill press and a cheap drill press is much smaller than the difference between a cheap drill press and no drill press, so don't wait until you can afford the perfect one.

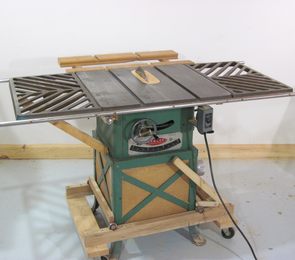
I can't say the same about a table saw. The cheapest benchtop table saws for under $200 tend to be awful, and will never produce a good clean cut. The better quality benchtop saws are much better, but cost as much as a contractor saw will. A contractor saw is the type of table saw with the motor at the back and open at the bottom. They tend to be made of cast iron, and good value for the money. Hybrid saws are also becoming popular. Hybrid saws are essentially built like contractor saws, but with the motor in the cabinet, just like a cabinetmaker saw. They are much cheaper than cabinetmakers saws and not as heavy. The saw at left is my first table saw, a 40-year old contractor saw, which I enclosed on the bottom to keep the sawdust inside. At present, I use a hybrid table saw
To get a cleaner cut on a table saw, it helps to buy a good quality saw blade for your table saw. With a decent table saw, and a good quality blade, it should be possible to get a cut that is smooth enough that it should require only minimal work to prepare it for finishing.
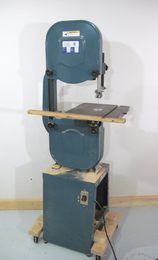
The Beginning of WoodworkingThose tools, plus a band saw, were all I had when I built my marble machine one. So you can go quite a ways with just this much equipment.

A nice thing about a bandsaw is that it's not scary to use. Sure, a bandsaw can cut your fingers off too, but it will probably cut your finger slow enough that you can pull it back before it's a major injury. I cut into my thumb with a band saw once when I was a kid. I pulled back as soon as I felt it, and the cut on my thumb wasn't even deep enough to warrant a band-aid. So if table saws scare you, get a band saw first.
A band saw is also very handy. It cuts cleaner than a jigsaw, but perhaps one of the biggest advantages of a band saw is convenience. It's my tool of choice for making most quick rough cuts.I also use it for cutting up long scraps to short pieces to fit them in the scrap box. I really use the band saw a lot. I actually bought my band saw before I bought a table saw - I saw one marked down at a woodworking show, and I knew I'd get one eventually, so I jumped on it. That was before I built my own
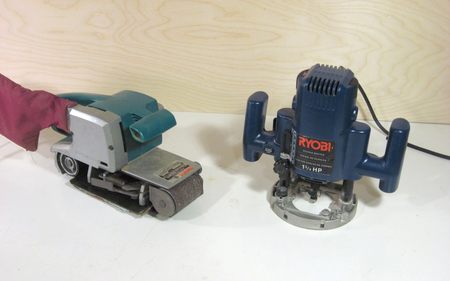
The Beginning of WoodworkingNext it's probably time for some more power tools. A belt sander often comes in handy. A router is also a really nice thing to have. Don't fret too much about which router to get - most woodworkers have more than one. So if you don't like some aspect of your router, it will still be handy as a second router later. Most people would also recommend that you get some sort of miter saw for making crosscuts. Personally, I have always just used a crosscut sled. Miter saws just don't have the rigidity to produce a cut as clean as can be made with a table saw sled, so I have never been a fan of them.
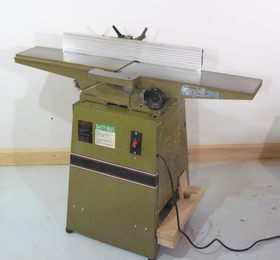
The Beginning of WoodworkingMoving up to the next level, the next machine to get would be a jointer planer. A jointer planer is very important if you want to glue up pieces of wood side-by-side to make panels. It's just plain all around handy for planing stock. I'd recommend you get a jointer planer before you get a thickness planer, because there is so much more that can be done with a jointer than a thickness planer. A thickness planer is really handy to get stock to the right thickness, although in a pinch, that can also be done on the table saw by putting the workpiece between the fence and the blade. If you cut from both sides, you can thikness stock up to twice the maximum depth of cut of your table saw. 

Tools that I don't recommend buying


All the tools below have their uses, and you may eventually get to a point where they are needed. But if you are just starting out, I'd recommend waiting until later before buying any of the tools below:

Compound sliding miter saw

Hardware stores are full of big compound sliding miter saws. But before you buy one, ask yourself, how often do you need to cut miters on stock wider than a non sliding miter saw can handle? For the few times you have to do that, it's probably better to use a circular saw. The complicated mechanism of a compound sliding miter saw makes them less rigid. Which means an expensive compound miter saw may not make as clean a cut as a non-sliding miter saw for a third of the price.

Do everything combination machines

Avoid machines that can be converted from one machine to another. The ShopSmith is a prime example of such a machine. Multi purpose machines are usually good at one or two functions, but other aspects are compromised. But the real problem is that every time you need to switch functions, you need to convert the machine. And the cost of these machines is usually high enough that you could get several single function machines for the same price.

Pre-built workbench

If you want to get into woodworking, a good project to tackle is building your own workbench. It's really not that hard. So if building your own workbench is a bit too much work, or too intimidating, then take a step back and examine whether you really want to get into woodworking. This may be different if your goal is to cut silhouettes of kittens out of plywood with a scroll saw, but I wouldn't call that sort of activity "woodworking".

Nail gun or brad nailers

Furniture shouldn't use a lot of nails. If you must use nails, you can always drive them in with a hammer. I am sure you have heard the saying "if all you have is a hammer, every problem looks like a nail". Now, if you have a nail gun then... Well, go figure.

Fancy table saw miter gauge and fence

Fancy miter gauges sure look nice, with all the colored bits of anodized aluminium and brass knobs. But are those really something you need? Do you really think that an Incra brand miter gauge made out of bent sheet metal is more trustworthy than the more solid cast aluminium one that came with your saw? Sorry, but those are some of my pet peeves. Build yourself a good table saw sled instead, and you won't need to second guess it. If you cut a lot of 45-degree miters, make another sled with a 45 degree angle.

Scrollsaw

Scrollsaws are good for projects like cutting puzzles or silhouettes of cutesey animals out of wood. But for making furniture, scrollsaws just aren't up to the task. Scrollsaws, along with Dremel tools, do have their uses in crafts, but for woodworking, they are just a little too small. That said, Dremel tools are very useful for sharpening brad point drill bits, forstner bits, and bandsaw blades, so they do have a use in woodworking.

Lathe

You can make nice candle sticks and blows with a lathe. And if your aspiration is wood turning, a lathe is definitely something you want to invest in. But few funtiture projects require the use of a lathe. I'm not saying you should never get a lathe, but a lathe is not one of those "must have" tools like a table saw or drill press.

Track saw

A track saw will allow you to make many cuts that would otherwise require a table saw, and is hard to beat if you need to cut up whole sheets of plywood. But for the price of a track saw, you can buy a table saw, and table saws are so much more versatile and convenient. So if you are just starting out, don't let anybody tell you that you don't need a table saw if you have a track saw.


What to do next?

Well, that concludes my introduction to woodworking for beginners. For more information follow some of the links in the article - they are all relatively easy projects.


You can also watch some of my woodworking videos on YouTube. to get a better sense of how I work.

You will probably also enjoy the Woodworking for mere mortals YouTube channel, by Steve Ramsay. Very entertaining, and, I would guess educational for beginners. I enjoy watching them because Steve is very entertaining. Steve also has a Woodworking for mere mortals blog.

So have a go at it. Who knows where it might lead. Maybe some day you'll have a workshop like this one


That concludes what he has to say. I hope everyone who reads this gets an idea or uses this to either start the process of woodworking or make an addition to their shop like I have. 

Please post any questions or comments you might have with the above information.

Saturday, November 29, 2014

How Do I Choose the Right Saw Blade?

Awhile back I was searching for a new blade for my table saw and my old miter saw and while searching I was overwhelmed with all the different types of blades I had to choose from. I came across a few websites that had this info. So I will share what they had to say. 


How Do I Choose the Right Saw Blade
The picture above is from Wood Craft


Just Saw Blades posted this information below on how to choose which saw blade is needed for which job.

This is the question that seems to come up with anyone who isn't the most advanced of users. In carbide circular saw blades, there are so many options, so many designs and configurations it’s overwhelming to some, especially those who never knew there were any choices.

I’m going to try to clarify and simplify the selection process for you here. But first, I want to talk a little about the saw itself, since choosing the wrong saw can create real headaches when it comes to trying to buy replacement and specialty blades. Keep in mind not only the size of the saw, but the size of the arbor when selecting a new power saw. Or picking up an old one at a yard sale, estate sale, etc. There are some great old table saws out there, like the old, solid-as-a-rock Sears models that have 3/4" arbor shafts, for example. Then there was the huge batch of Asian-made 10” miter saws on eBay with 1” arbors. With cheap OEM blades on them. When I saw those, I knew in a few months I’d be getting emails from folks looking for new blades for the bargain saws they bought – blades no one makes. I was right. And those bargain shoppers found out it’s almost impossible to get blades off the shelf, that if they’re lucky, they can get one bored to fit – at a price.

Almost all power saws for the American retail market from about 8” to 10” come standard with a 5/8” arbor so that’s what blades are made for. Anything 12” and larger comes with a 1” arbor. DeWalt makes some 12” miter saws that come with a reducer so you can use either arbor size and there are some 12” industrial double miters that (like Pistorius) that have a 5/8” shaft. But other than those, the standard arbor sizes are about written in stone so if you’re shopping for a new saw, stick with them.

Okay, now about those blades……

Size (or Diameter) 


This one may seem pretty obvious but once in a while I run across someone who wants to use a blade that’s a different size than their saw (sometimes to save money, believe it or not). In most cases, I advise against it. First of all, there’s the issue of clearance: a bigger blade won’t likely clear the blade guard on a miter or radial arm or the throat plate on a table saw. A smaller blade won’t give you the depth of cut.

Then there’s what’s not so plain to see: the design and geometry of the blade. Smaller saws run at higher RPM, the bigger the saw, the lower the RPM. Blades are designed to work in concert with the saw to give you optimal performance. Enough said about that.

Exceptions? Yes, most notably a dado. Most craftsmen will use an 8” dado on a 10” table saw and in fact, that’s the only size most manufacturers make – with a 5/8” arbor bore. For the industrial market, a few companies like SystiMatic make a selection with larger sizes and 1” bore, but you’ll need a pretty powerful, heavy saw to use it. A 10” SystiMatic dado weighs in at over 10 pounds and cuts a lot of material.

Another exception may be a highly specialized use, by a very knowledgeable professional, such as the one I heard about not long ago where they were using an 8” non-ferrous blade on a 10” or 12” table saw to cut aluminum plate. This was a blade designed for cutting extrusions, not solid aluminum, but these guys understand the geometry and use it to their advantage.

Purpose or Material


This one can be problematic if you’re trying to buy a blade at Home Depot, Lowe’s or ACE where all they sell is blades for cutting wood on hand-held saws (Skil, etc.), table saws and miter saws. But if you’re shopping online or at a saw shop or good tool store, you can find specialty blades listed by purpose and material or ask someone who knows what you’re talking about. And believe me, it’s important to buy a blade designed for what you want to cut.

The price of a 24 tooth rip blade might look attractive but if you try to crosscut with it you won’t be happy. Conversely, try to rip solid wood with a trim blade and you’ll burn more wood than you cut. Use either blade to cut laminate flooring and you’ll regret it when the top layer chips and the blade gets dull after three cuts. Laminate flooring, like Pergo, is very hard and has aluminum oxide in it – use an aluminum-cutting blade.

Manufacturers of saw blades that make blades for the professional make several different blades, with different configurations, for different uses and they identify them accordingly. There’s no need for me to list them here, just stick with their recommendations and you shouldn’t have any problems.

Type of Saw


Different types of power saws work best with blades made for them, and can work horribly (if at all) with the wrong blade. Using the example of a rip blade again: put a rip blade on a radial arm saw and even if you rotate the carriage to rip, it’s going to want to lift the wood up off the table. Try to crosscut with anything vaguely resembling a rip blade (aggressive rake/hook angle) on that same saw and the whole carriage will try to “run” straight out at you. And the teeth will dig in and bind up your saw, tripping a breaker. Been there and done that one before I knew there was such a thing as a radial arm blade.

There are some types of blades, such as metal cutting blades, that can be used on and are recommended for all types of saws: table saw, miter saw and radial arm. Also some moderate-rake/hook combination blades. But a good rule of thumb is to just stick to what the manufacturer recommends. Buy a table saw blade for a table saw, a miter blade for a miter saw and a radial arm blade for a radial arm. When you think about it, you’re not going to be cutting sheets of plywood on a miter or radial arm and you’re probably not going to be mitering moldings on a table saw.

Tooth Count

Most people understand this one, for the most part. Generally speaking, you want a higher tooth count for cleaner, finish cuts, no matter what the material. You want fewer teeth for thicker material. Think of crown molding versus a 2 by 4. But if you’re a hobbyist or homeowner doing odd jobs (like yours truly) you’ll want a compromise blade, something you can use to reasonably cut a 2 by 4 or trim. On a miter saw or radial arm, 60 is a good number: 40 will tear out on trim work and 80 will have to fight through a 2 by 4. On a table saw, it’s a little more forgiving: 40 to 50 is what you’ll find on good combination blades, like the famous Forrest Woodworker, the TENRYU Gold Medal or the SystiMatic GP or Budke Combination. Virtually all manufacturers make combination table saw blades with tooth counts in this range so obviously it works.

By the way, as usual there are exceptions to this rule, especially when it comes to cutting plastics. And it depends on the type of plastic, whether it’s hard and brittle, soft and with a low melting point or in between. Too many teeth will cause melting, which will load or gum up the teeth, thereby giving you a very poor cut. Not enough teeth, particularly in a hard plastic, will chip like crazy.

Tooth Design and Configuration


This is the one topic that can be most confusing and the one where you might, in some cases, find conflicting theories and/or claims from different manufacturers. Not to say one is right and the other is wrong, sometimes two completely different designs will work equally as well for a job. For example: SystiMatic uses a triple chip for plastic and TENRYU uses alternating top/alternating face. But I suppose I should simplify this before confusing you more.


How Do I Choose the Right Saw Blade

The above picture is from Rockler Woodworking and Hardware

Alternating Top Bevel – ATB This is by far the most common carbide tooth configuration, used for cutting solid wood, plywood and particle board. Further, there are several variations on the design that turn it into a specialist:

ATB w/Raker – ATBR - Commonly called a “planer” blade or “planer combination” this combines usually four ATB teeth with one flat-top raker tooth for cleaning out the cut. It makes a true multi-purpose blade for your table saw, whether cutting plywood, crosscutting or ripping. A further variation on this one is a specialized plywood blade that uses more (like 10) ATB teeth for each raker.

Alternating Top Alternating Face – ATAF Very, very smooth crosscuts, with the outer edge of the tooth face planing the material as the blade cuts through. Also good for Melamine and veneered plywood. And as mentioned, TENRYU uses this for their plastic blades, too. Put one on a miter saw and get great cuts in wood and plastic, both. A variation on this one is to add a raker every few teeth to clean out the cut. It would be called ATAFR, of course.

High or Steep Alternating Top Bevel – HATB This tooth shape, combined with a negative or neutral hook or rake angle, is used when you need a real knife-like edge to cut through Melamine or fine veneers. Also sometimes used with a positive hook for eliminating tear-out when crosscutting trim. The drawback to this type of tooth is that the quality of your cut depends on very pointed teeth and the more pointed they are, the faster they dull.

Triple Chip Grind – TCG This is a versatile tooth shape but the primary purpose is for cutting hard materials, like aluminum, laminate flooring, hardwoods and “solid surface” such as Corian. It incorporates flat top raker teeth with what look like a flat top teeth with the corners ground off at an angle. Without using sharp points like ATB or ATAF blades, a TCG blade will last much longer and handle the high impact of cutting hard stock. Manufacturers combine this shape with different hook/rake angles to specialize blades, from negative hook angles on non-ferrous blades to very aggressive hooks on rip blades. Drawback: may tend to tear out when crosscutting softer wood like pine or hemlock.

Flat Top Grind – FTG Flat top grind teeth, when used alone, have only one purpose: cutting wood with the grain. Ripping. And they’ve lost popularity in that use, too, as more manufacturers are using TCG and ATB teeth to give rip cuts smooth enough they don’t need to be run through a jointer to glue up joints. But you’ve seen how other designs incorporate flat top teeth into doing their job well.

Others - Some manufacturers use some highly specialized tooth shapes for their more specialized, exotic blades but we won’t need to go into those here. They’re far from basic and anyone who needs one of those probably knows more about it than anyone.

Rake or Hook Angles


How Do I Choose the Right Saw Blade
The above picture is from Rockler Woodworking and Hardware
How Do I Choose the Right Saw Blade
The above picture is from Rockler Woodworking and Hardware

When considering a blade for your particular type of saw, this is sometimes the most important consideration. And when combined with tooth shapes and configurations, the factor of rake angle can change a blade’s entire purpose.

Where the saw is concerned, you don’t want to use a positive hook on a radial arm (some manufacturers rate their combination blades for them but they’re not aggressive hooks) and a miter saw works best with negative, neutral or moderately positive hooks – depending on what you’re cutting.

Where material is concerned, generally harder materials require a negative hook or no (neutral) hook angle. And if wood is prone to tearing out when crosscutting, like softer conifer wood, a negative hook is better.

So what is rake or hook angle? Lay a straight edge across a saw blade, intersecting the arbor hole and look at the relationship of the carbide tip to the straight edge. If the top of the tip leans toward the edge, that’s a positive hook or rake. If it leans back away from it, that’s negative. If it’s parallel to it that’s neutral or a zero hook.


How Do I Choose the Right Saw Blade
The above picture is from Rockler Woodworking and Hardware

Friday, November 28, 2014

Bostitch Pneumatic18 Gauge Brad Nailer Model # BT1855

I just received my Bostitch Pneumatic Brad Nailer. My wife bought me this from Sears with her Sears points that she had been saving up. Original price was $109.00 but she got it on a Pre-Black Friday deal for $55.00. It is a factory reconditioned model but it looks as if it was never used.

Bostitch Pneumatic18 Gauge Brad Nailer Model # BT1855

Bostitch Pneumatic18 Gauge Brad Nailer Model # BT1855


For the longest time I have need one of these when building my projects. I have always used a Hammer and brad nail to nail pieces together. I also used a drill with a very small bit to pre-drill the holes. Anyone that does this knows how much of a pain it can be. Where as with the Brad Nailer it is much easier and extremely quick. 

Bostitch Pneumatic18 Gauge Brad Nailer Model # BT1855


I will get many years of use from this tool. I have quite a few projects that I plan on doing once my shoulder is fully healed from my surgery.

I will give an update with another post after I am able to use this. I look forward to hearing     

Specifications

Model # BT1855
Fastener Type - BT13XX Series
Fastener Range - 5/8" to 2-1/8" (15mm - 55mm)
Fastener Gauge - 18ga
Oil Free
Magazine Capacity - 100
Weight - 2.7 lbs 
Operating pressure - 70-120 psi
Requires - 2.83 CFM (cupid feet per minute)


Added features

Belt hook
Pencil sharpener

Bostitch SKU# and Length in inches and millimeters All are 18ga.

BT1300 - 5/8"  or 15mm
BT1303 - 3/4" or 19mm
BT1309 - 1" or 25mm
BT1332 - 1-1/4" or 32mm
BT1338 - 1-1/2" or 38mm
BT1345 - 1-3/4" or 45mm
BT1350 - 2" or 50mm
BT1355 - 2-1/8" or 55mm

Saturday, November 22, 2014

BIG Buddy by Mr Heater

11/21/2014

So I finally have some heat in my shop so that I can work in it during the winter months. I have been deciding on what to get and how much I really wanted to spend. The heat system that I really want is a ceiling mounted gas heater made by Modine Hot Dawg, I will eventually get one but for now this heater will be suffice.

So the unit that I purchased was a Mr Heater BIG Buddy. I shopped around for the best price and found it at Menard's for 30-40 dollars cheaper then anywhere else in town. It is a portable propane heater that I could use pretty much anywhere. When I was in the aisle at Menard's I was contemplating whether to get this or a forced air propane heater (Torpedo heater, Salamander) or whatever else people call it. I decided on the BIG Buddy.

BIG Buddy by Mr Heater

BIG Buddy by Mr Heater


Steve who is the Plumbing department manager through in the hose and filter for free. Retail value on this was roughly $25.00. So total savings were $55.00 - $65.00 for this unit. While I was there I picked up a few other items such as a 20 lb propane tank and a bottle of fuel starter for our pellet stove and a 1 gallon Stanley shop vac which I will review in another post.

After getting home and hooking up the tank and hose I realized it needed 4-D Batteries and a fuel filter . So I will have to go them tomorrow. The batteries are for the Fan.

BIG Buddy by Mr HeaterBIG Buddy by Mr Heater


BIG Buddy by Mr Heater


So as you can see in the pictures you can either put one to two 1 pound propane canisters or hook up two 20 pound tanks. If you want the bigger tanks you will have to buy hoses to hook them up. Also when you purchase the hoses you will need a fuel filter for each hose because propane is dirty and there needs to be some sort of filtration so you do not ruin your heater.


11/22/2014

I went back to Menard's and bought the Fuel Filter and also picked up 2 one pound propane canisters for a backup if I run out the bigger tank while working in the shop. I have it all hooked up now but the temperature outside is 63 degrees. I did not run it as long as I hoped for but for the time that I had it running my shop did heat up. I actually had to turn it off because it got to warm in there.

So the unit is for indoor/outdoor use but I took a precautionary measure by opening a window to let some fresh air in. I will have to get a carbon monoxide detector just to have another safe guard when using the heater.

BIG Buddy by Mr Heater

BIG Buddy by Mr Heater

The unit is light and compact so if you need to bring it with camping or tailgating at a football game or just want to sit on your deck/porch in colder weather just to enjoy the outside this is the unit to buy.


Thursday, November 20, 2014

Gaffer Power Tape review

Gaffer Power http://www.gafferpower.com #gafferpower

11/19/2014 – Received and tested the initial results

I was immediately impressed with the Gaffer Power Tape. The strength of the tape was impressive. The texture is a lot different than that of your normal tape as it has a cloth like feeling rather than a plastic feeling from other tapes. I tested its tear capabilities and it tears almost at 90 degrees. Let’s face it you will not get a perfect 90 degree tear unless you cut it with scissors. With the tearing I did notice that with other brands of tape, when you tear a piece it tends to stretch on the end you start the tear from. With the Gaffer tape no matter how you tear it you get a very good tear and no bunching in the corner of the initial tear.

Gaffer Power Tape review

Gaffer Power Tape review


I have taped a few cords in my shop with this and other brands of tape and then removed it to see how easy it is to remove. The results were great for the gaffer tape. It was easy to remove and left no residue. The other tapes however were a pain to remove and a few did leave a bit of residue behind. Now for the long term affect I'm not sure. I will update my review in a few weeks to see if the results are the same but from the initial testing I believe I will get the same results.

Gaffer Power Tape review


I received one or more of the products mentioned above for free using Tomoson.com. Regardless, I only recommend products or services I use personally and believe will be good for my readers.

Friday, November 7, 2014

Using a Shop Vac for a Dust Collection system

Using a Shop Vac for a Dust Collection system
Ridgid 16 gallon Wet/Dry Vac

You don’t have to put up with that irritating layer of sawdust that seems to settle throughout the shop, garage or basement every time you cut and sand a few lengths of trim. Nor do you have to shell out the big bucks for a central dust collection system.

You can capture most nuisance dust with a standard shop vacuum and a few accessories. If you’re lucky, you can plug the vacuum hose directly into the dust port of your tool. But that won’t happen often, because the size of dust ports on power hand tools varies.

The best strategy is to buy a universal adapter, which is available at home centers and other stores that sell shop vacuum accessories. You simply cut the soft rubber with a utility knife to fit the dust port on the tool and the vacuum hose. (Recommend 1-1/4 in. hose for most hand power tools.) However, keep duct tape handy for odd-size dust ports.

Buy a 6-ft. (or longer) length of 1-1/4 in. hose to connect directly to hand power tools. Then connect the 1-1/4 in. hose to the standard 2-1/2 in. vacuum hose with a plastic friction fit coupling. The smaller hose is light and flexible compared with the larger hose. No drag, no kinks. You’ll barely notice the 1-1/4 in. hose as you move the saw, sander or other tool across the work piece. Most sanders have dust ports, but relatively few circular saws and routers have them.

These days, most bench-top saws and planers have dust ports, and they make a huge difference in controlling dust, even with a shop vacuum. You won’t get it all, but even an 80 percent reduction will help a lot.

The connections are usually easy. In most cases, the ports are a standard 2-1/2 in., so you can simply push the 2-1/2 in. vacuum hose right into the port. This works best with larger capacity vacuums, because the sawdust and chips from a table saw or planer build up fast!

Ideally, tool manufacturers would standardize dust ports so you could swiftly move your hose from one tool to another. But that’s not yet the case. In the meantime, save time and frustration by installing an adapter permanently on heavily used tools, such as miter saws. Then you can simply plug in the hose.

Note: You’ll find that dust collection on miter saws isn't as effective as on other tools, but this will definitely help.

Higher-priced shop vacuums often come with a special switch that turns on the vacuum automatically when the tool starts up. (Fein is one brand.) This is a great feature, because you don’t have to walk over to the shop vacuum to turn it on every time you want to make a cut.

However, you can also solve this problem in three other ways. One, use a pedal switch to turn on your vacuum. Two, buy a remote switch and turn the vacuum on from anywhere in the room. Or three, plug your tool and vacuum into a special power box that activates the vacuum when the tool is turned on.

You may have noticed the cloud of fine dust that blows out the exhaust when you turn on most shop vacuums. Small dust particles flow right through standard shop vacuum dust filters. To stop this fine dust, buy a high-quality HEPA filter from any store that sells your vacuum brand. They’re well worth the price because they last a long time and can be rinsed clean.

Dust collection hoses add to the clutter in a small shop. But if you tend to work in one area, you can eliminate some of the tangle and keep the tool from getting hung up by loosely hanging the vacuum hose from a hook. Or add several in the areas you work in most often.

For $70 to $110 and an hour of your time, you can set up a whole-shop dust collection system, complete with enough blast gates and inlets to handle a range of fixed and portable tools. You simply push the parts together (friction-fit them), so you can easily rearrange them as needed.

Add an 18-ft. length of 1-1/4 in. hose for hand power tools and a remote control for the vacuum, and you can work virtually dust-free from anywhere in the shop.

Many power tools don’t have dust ports. But if you’re doing a lot of cutting and drilling, you can easily position a portable dust collector nearby. Depending on the system, you may have to fiddle with adapters and metal duct (from home centers) to make the transition to the vacuum hose. You can also rummage through the HVAC aisle at your local home center and put together a less expensive system with stock parts and duct tape.